Getting Started
WARNING
GNOME Shell and Extensions use ESModules as of GNOME 45. Please see the Legacy Documentation for previous versions.
This page will guide you through setting up a basic development environment and creating a new extension. If this is your first extension, it is recommended that you use the gnome-extensions tool.
GNOME Extensions Tool
TIP
The gnome-extensions create command can be run from any directory, because it will always create the extension in ~/.local/share/gnome-shell/extensions.
GNOME Shell ships with a program you can use to create a skeleton extension by running gnome-extensions create.
Instead of passing options on the command line, you can start creating an extension interactively:
$ gnome-extensions create --interactiveChoose a name:
no-line-numbersName should be a very short (ideally descriptive) string. Examples are: “Click To Focus”, “Adblock”, “Shell Window Shrinker” Name: Example ExtensionChoose a description:
no-line-numbersDescription is a single-sentence explanation of what your extension does. Examples are: “Make windows visible on click”, “Block advertisement popups”, “Animate windows shrinking on minimize” Description: An example extensionChoose a UUID for your extension:
no-line-numbersUUID is a globally-unique identifier for your extension. This should be in the format of an email address (clicktofocus@janedoe.example.com) UUID: example@gjs.guideChoose the starting template:
no-line-numbersChoose one of the available templates: 1) Plain – An empty extension 2) Indicator – Add an icon to the top bar Template [1-2]: 1
The whole process looks like this on the command line:
$ gnome-extensions create --interactive
Name should be a very short (ideally descriptive) string.
Examples are: “Click To Focus”, “Adblock”, “Shell Window Shrinker”
Name: Example Extension
Description is a single-sentence explanation of what your extension does.
Examples are: “Make windows visible on click”, “Block advertisement popups”, “Animate windows shrinking on minimize”
Description: An extension serving as an example
UUID is a globally-unique identifier for your extension.
This should be in the format of an email address (clicktofocus@janedoe.example.com)
UUID: example@gjs.guide
Choose one of the available templates:
1) Plain       –  An empty extension
2) Indicator   –  Add an icon to the top bar
Template [1-2]: 1Once you finish the last step, the extension template will be created and opened in an editor.
Manual Creation
TIP
The directory name of the extension must match the UUID of the extension.
Start by creating an extension directory, and the two required files:
$ mkdir -p ~/.local/share/gnome-shell/extensions/example@gjs.guide
$ cd ~/.local/share/gnome-shell/extensions/example@gjs.guide
$ touch extension.js metadata.json
Open extension.js and metadata.json with an IDE like GNOME Builder, or a simple editor like GNOME Text Editor, then populate them with the minimum requirements.
metadata.json
{
    "uuid": "example@gjs.guide",
    "name": "Example Extension",
    "description": "An example extension",
    "shell-version": [ "45" ],
    "url": "https://gjs.guide/extensions"
}
extension.js
import St from 'gi://St';

import {Extension} from 'resource:///org/gnome/shell/extensions/extension.js';
import * as Main from 'resource:///org/gnome/shell/ui/main.js';
import * as PanelMenu from 'resource:///org/gnome/shell/ui/panelMenu.js';


export default class ExampleExtension extends Extension {
    enable() {
        // Create a panel button
        this._indicator = new PanelMenu.Button(0.0, this.metadata.name, false);

        // Add an icon
        const icon = new St.Icon({
            icon_name: 'face-laugh-symbolic',
            style_class: 'system-status-icon',
        });
        this._indicator.add_child(icon);

        // Add the indicator to the panel
        Main.panel.addToStatusArea(this.uuid, this._indicator);
    }

    disable() {
        this._indicator?.destroy();
        this._indicator = null;
    }
}
Testing the Extension
TIP
For detailed information about loading and debugging GNOME Shell extensions, see the Debugging page.
Depending on whether you are running a Wayland session or an X11 session, we will prepare a simple debugging environment. For either session type, start by opening a new terminal, such as GNOME Terminal or GNOME Console.
Note that GNOME Shell will log many messages unrelated to your extension, and proper logging will help when developing your extension.
Wayland Sessions
TIP
You may need to install mutter-devkit on GNOME 49 and later.
mutter-devkit Packages
| Distribution | Package Name |
|---|---|
| Arch | mutter-devkit |
| Fedora | mutter-devel |
| Ubuntu | mutter-dev-bin |
Wayland sessions support running GNOME Shell in window, so an extension can be tested without disrupting the current session.
Start a nested GNOME Shell session
sh$ dbus-run-session gnome-shell --devkit --waylandGNOME 48 and earlier
 ```sh:no-line-numbers
 $ dbus-run-session gnome-shell --nested --wayland
 ```
Open a terminal inside the new session and enable the extension
sh$ gnome-extensions enable example@gjs.guide
X11 Sessions
X11 does not support running nested sessions, so we will restart GNOME Shell to load the extension and then enable it.
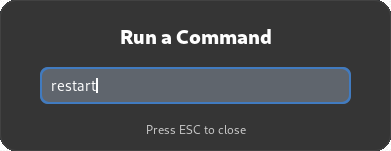
Press Alt+F2 and run the built-in
restartcommand
Enable the extension
sh$ gnome-extensions enable example@gjs.guideMonitor the output of GNOME Shell
sh$ journalctl -f -o cat /usr/bin/gnome-shell
Loaded extensions are cached by the JavaScript engine. Therefore, after any change to the extension code, these steps have to be repeated to load the changes.
Next Steps
Now that your extension is enabled and you have a basic development environment, you can make changes to the source code and repeat the process to test them.
Next, you can prepare your extension for Translation into other languages, making it available to more users and potential contributors.